There are many different reasons why people decide to go solar. Some people might be interested in switching to clean and green energy sources. Other people wish to reduce their dependency on the electricity grid.
One of the main reasons to choose solar is to cut down on energy costs. According to a recent Pew study about solar energy, most people who have already installed or plan to install solar panels do so because they want to cut down costs on their electricity bills.
It's possible to save money by going solar through a reputable solar company. After all, they’re the primary source for most people who go solar.
However, if you're looking for the most cost-effective option, you might want to look into DIY installations. After all, it’s usually less expensive to do something yourself rather than to hire others to do them for you!
So, what are the advantages and disadvantages of installing a solar system yourself? What steps must be taken to complete one?
To help you decide whether to install a DIY solar power system yourself, we'll look at each major benefit and downside of a DIY solar power system and then go through the design and implementation process into six simple steps.
What are the Pros and Cons of Building Your Own Solar Power System (DIY)?
Even though it may be less expensive than hiring a professional installer, DIYing your own system is still a big and expensive commitment. You may wish to determine whether a DIY solar power system is suitable for you before you invest too heavily into the process.
If you want to know whether DIY solar is right for you, here is an overview of the potential pros and cons.
Pro: DIY Satisfaction
If you're an individual who loves taking on large and difficult DIY jobs, then a solar power system installation may be the kind of project you're looking for.
To succeed, you'll need to mix up skills from several fields—including negotiating municipal processes, financial planning/management, proficiency with tools/machines, electrical repair, and even taxation.
Also, many steps are involved in installing solar panels, including researching, planning, shopping for equipment, obtaining permits, installing the system, connecting the electrical wires, and monitoring the system.
This is an exciting project that will occupy you for some time. If you finish it yourself, you'll be proud of your accomplishments.
Pro: Cost Savings

Installing solar panels yourself can help you avoid high initial costs. On average, the cost of installing an entire residential solar system by a professional installer is around $2.98 per watt. A typical 5KW (5,000 watts) solar power system would cost about $14,900.
On the one hand, a 5 kW solar power system kit costs between $1.0 – $1.4/watt. If you plan to complete the entire job by yourself, the total costs of a 5kW DIY solar system could range from $5,000 to $7,000.
If you choose to go with DIY instead of hiring a professional installer, you could save approximately $7,000 to $9,800.
Now let's take a look at the downsides (Cons)
Con: Not Able to Claim Some Incentives
Many states offer tax credits and other financial incentives for homeowners who install solar panels.
However, some incentive programs become available once a certified solar installer has completed the installation. You should check what incentives and rebate programs are available where you live.
Con: There is No Support for Faults or Warranty Issues
If anything goes wrong with the equipment, you're on your own.
You can always call the manufacturer directly, but proving a warranty claim can be difficult. Moreover, you could even void the warranty by performing an improper install.
Con: Physical Danger

DIYers who install their own solar panels face two major risks: heights and high voltage.
The physical risks they're not just limited to the installation phase. You'll need to fix the problem if there are any issues during the 25 years of the solar panel lifespan.
Worst case scenario: If you don't wire everything correctly, you risk your roof catching fire!
Con: Roof Damage/Leakage Risks
It may be one of the biggest risks financially if you decide to install a solar panel system yourself.
If you don't have a flat roof, your solar panel installation will require a lot of holes drilled into your roof. If drilling into the wrong spot on your house’s rooftop could lead to structural damage, then incorrectly sealed and flashed roofs could lead to leaks and/or mold issues.
One thing to consider when installing a DIY solar system is that it could void the warranty of your house. You might need to pay for any repair costs if something goes wrong.
Con: It requires lots of effort and time
If you decide to install solar panels on your own, you may find it rewarding—but only if you're looking for a serious DIY project.
Solar Panel Installation Guide: 6 Simple Steps for Installing Your own Solar Power System (DIY).
Now let's look at the six steps required to turn your DIY solar power system from idea to reality.
1. Create a DIY Plan and Designs for Your System
This is the most difficult step in the DIY project, especially if you have no experience building an energy system.
A. Set your goals
What exactly do you want out of your system? financial benefits? Power backup? Independence from the grid?
It would help if you decided which goals you want to achieve before choosing the right system type, how complicated the installation will be, and how expensive the whole thing will be.
B. Select the right solar system type for your needs.
Next, decide which solar power system type best matches your goals.
All systems share some components: solar cells, an inverter, mounting hardware, and wiring.
There are, however, important differences between them, which can affect the projects' costs and complexities. Here's a quick overview of each.
Grid-tie Solar Panel System
This solar battery uses electricity from the grid as a backup energy source via net metering.
They require fewer components than other solar panels and have lower upfront installation costs.
One disadvantage of these devices is that they don't supply backup energy.
Hybrid Solar Power System
A hybrid solar system uses batteries and a power grid connection to provide electricity.
Hybrid solar panels are costlier than their off-the-shelf counterparts, but they provide additional features like backup power during a blackout and time-of-usage arbitrage.
Off-Grid Solar Power System
An off-gridded solar system operates independently of the power company. Since there isn't a grid to rely on for backup, the solar array requires many panels and a large storage bank to meet its energy requirements at any time, regardless of the season or weather conditions. This is the most costly type of system.
C. Check Solar Rules and Regulations
There are various regulations governing solar installations. They may vary greatly from state to state and even within local jurisdiction boundaries.
Check if state laws allow connecting a solar system to the power grid unless a licensed contractor does the installation.
If this is the situation where you live, you cannot set up a DIY solar panel installation yourself.
You'll likely require construction and utility permits if DIY is permitted where you live. Usually, this involves an onsite inspection which may be conducted by either a structural engineering professional or a licensed electrical contractor.
Once the installation is complete, you'll have to go through another round of inspections before the power can be turned on and connected to the grid for use.
D. Design the System
This is one of many complex steps in building a DIY solar panel system. Your system should consider all of these factors:
Our solar panel calculator considers all these different variables to give you an accurate estimate of the total power generated by your solar panels throughout the year.
It also suggests a solar panel sizing for your specific house and even tells you where on your roof you should place them for maximum exposure to sunlight. You can try it by typing your zip code into the box below.
Determine the size of the system needed to offset 100 percent of your electricity use.
To add a battery to a hybrid or off-gridded solar power setup, you'll first need to figure out how big the battery needs to be.
Then you'll need to draw up an electrical circuit. They're a required component of your permit application and will be used as a guide when you install your solar panel system.
E. Do the Math
Once you've designed your solar panel system, it's time to calculate its cost and potential savings over the panels' lifetime.
Find out your costs by searching online for solar energy systems. One of the easiest ways to get started is by finding the cost of a complete, all-encompassing DIY solar kit that fits your desired system sizes. Then, it would be best if you calculated your utility bill savings.
First, figure out how much your system produces annually (see figures by region here). Multiply that number by the price of electricity where you live, and you've got a rough estimate for reduced energy bills.
After calculating the total cost and saving for your DIY solar panel projects, you can calculate its ROI.
We calculate the total financial benefits by taking into account avoided utility expenses (electric bills) and subtracting the cost of the solar panel system.
You can now figure out whether a DIY solar project makes financial sense.
2. Start the Permit Application Process
It's time to start doing something about our energy needs by installing solar panels. But let's not forget those pesky rules and regulations we discussed earlier! We’ll take care of these things first before we start working.
Next, write down all the licenses, permissions, and approvals needed for each entity from the state, your utility company, and your local AHO.
You'll probably have to get a construction and utility permit before beginning any work. It may require an inspection by either a qualified, licensed electrician, a registered structural engineer, or both.
Make sure everything required for your installation complies with local laws and regulations.
3. Acquire a Suitable Equipment Vendor
Here's a list of everything you'll need to get started building your own solar power installation.
The best way is to buy an entire DIY solar panel kit with everything you'll likely ever use. If not, you’ll have the difficult task of shortlisting specific elements and then determining which works best when combined.
When choosing between solar panel kits, we urge you to review online customer feedback on Solar Review to ensure that you purchase from trustworthy companies.
Regarding suppliers, look for ones with long warranty periods and excellent customer service. Both these factors are important, but I'd put them above the price. You will interact with suppliers a lot for technical assistance and possibly for warranty issues.
4. Install the Solar Panel System
By now, you should have successfully acquired all required permits and approvals to install your solar energy system and accepted delivery of the Solar panel kit or relevant part of the solar system. Now let's start installing the panels.
The specific details of the installation will vary depending on which system you choose.
The process described here is for a grid-connected solar PV installation using micro inverters for DC/AC power conversion.
Task 1: Install solar panel racking and mounting
Make sure you use a chalk line to measure exactly where on your roof you want the racks mounted before you begin installing them.
After that, look for good drilling bits for the top of the house to install lag screws. Use an AC current detector to check if there are any electrical wires nearby before drilling into them.
Before you put up lag screws, caulk the holes and install flashings to create a watertight seal. After installing the lag screws, you can use L-foot brackets to secure the rails to the lag bolts.
Task 2: Connect the microinverters
Let's talk about microinverters. These are little boxes that will control the outputs of each panel. You'll attach the microinverter to the rail using the included bolts.
Each box will have two wires coming out of it, one positive and one negative. You will connect them together to form a series circuit for each array.
Task 3: Connect the grounding wire
Ground the copper wire of an adequate size (gauge) by connecting it between the rails. This is an important step for safety and will help prevent any anomalies caused by a lightning strike or a power outage.
Task 4: Install roof junction box
A hole must be drilled in the roof to insert the junction box for wiring. If you have multiple solar arrays, you'll need to connect them separately to the central junction box. It allows you to harness the energy from the solar panels to supply electricity for your house.
Task 5: Install the solar panels
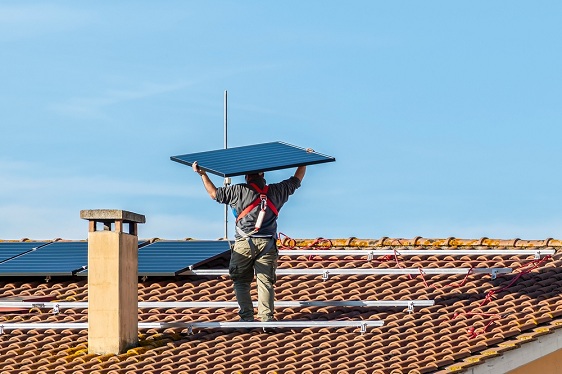
Now it's finally the right moment to install the solar panels. Each module is approximately 65" x 39", which is too large for one individual to handle alone.
If you're having trouble with this step, consider hiring someone to help you, especially if your roof is steep! Use a harness when you're up there!
Mounting rails for solar panel arrays are attached at this point. Get the wiring done before laying them out flat.
Each solar cell has a negative and positive terminal (DC wire) connected to it; connect these terminals to the panels using clips or zippers so they won't touch the roof.
After the wires are neatly tucked into place, attach them to the microinverters. Now, insert the provided screws into the railings on both sides of the solar panels to secure them in place.
Use end-clamps for solar panels; they keep the panels in position but are less visible from below.
Task 6: Home run connection
Once the solar panel system is installed, it's time to hook up the wires to the house. To do this, you must first install:
A conduit connects the roof junction boxes with the external junction boxes. The junction box, connected to an emergency switch, allows power to be cut off if something goes wrong. With this safety feature, you can quickly shut down your entire solar power system, which most jurisdictions require.
External junction boxes and emergency disconnects should be weatherproofed and installed in an area where they're both easily accessible and allow for quick connection to the house's main electrical system.
The wire is run from the breaker box to the house's main electrical panel.
You've installed your solar panels, but you'll need to take additional steps before turning them on.
5. Final Inspection and Interconnection to The Grid
After your installation is complete, contact your local AHJ for an inspection. They will determine when the system complies with local regulations and whether its design fits those detailed in your approved documents.
A licensed electrician must inspect the system to confirm that it complies with local codes.
You can apply for interconnection with your local utility if you pass the inspection. The utility will either set up a second meter for you or if there isn't enough space, they may be able to install a bi-directional or net meter instead.
The bi-direction meter can record your household's power exports to the utility company so you can receive credit for them on your monthly electricity bills.
6. Switch On Your System
Once you've completed all the necessary installation steps, you can commission your new solar panel. If you want to check whether your solar system is working, fire up your solar monitoring app. Most new inverters come with one these days.
Is the app showing that the system is working properly? Congratulations if you answered "yes." It took some effort, but you've finally finished!
Solar energy is highly rewarding whether you DIY or pay someone else to install it.
Suppose you've finished reading this long blog post; well done! It means you're seriously considering switching to solar energy. A journey that I hope you will find highly rewarding. Using solar panels reduces your electric bill, helps protect the environment and increases energy independence.
You could always go the DIY way if you have lots of time and skills to complete the project.
If DIY solar installations seem too daunting, don't worry: plenty of highly rated solar install companies can take care of everything for you.
We encourage you to look at our solar calculators, which will help you choose a renewable energy system that offsets 100% of your electricity bill.
Good luck with your solar journey!


